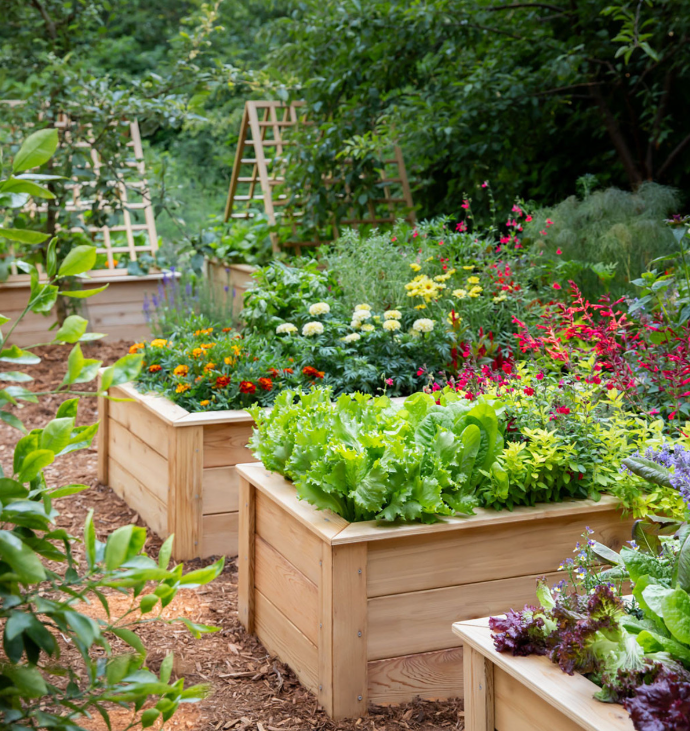
Building a raised garden bed is a fantastic way to grow vegetables, flowers, and herbs, especially if your garden soil is poor or compacted. Raised beds improve drainage, provide better soil structure, and can even make gardening easier on your back. Plus, they can be customized to suit any space, from small balconies to large backyard gardens. Here’s a simple, step-by-step guide on how to build your own raised garden bed from scratch.
Materials You’ll Need:
Wooden boards (cedar, redwood, or treated lumber are best)
Screws or nails
Power drill or hammer
Measuring tape or ruler
Saw (if you need to cut the wood to size)
Level
Landscape fabric (optional)
Soil (a mix of topsoil, compost, and organic matter)
Shovel and gardening gloves
Choose the Right Location
Before starting your project, pick a location that gets at least 6-8 hours of sunlight per day (depending on the plants you want to grow). Ensure the site is level and has good drainage. If you’re placing the bed on grass or weeds, you may want to lay down landscape fabric to prevent unwanted growth from coming through the bottom of the bed.
Decide on the Size
The size of your raised bed depends on the space you have available. A common size is 4 feet wide by 8 feet long, as this allows easy access to the center from either side. The height of the bed should be at least 12 inches deep, though 18 to 24 inches is even better for deeper-rooted plants. You can use a measuring tape to mark out the dimensions of your bed.
Cut and Assemble the Wood
Using your saw, cut your wooden boards to the desired lengths. For a 4×8 foot bed, you will need four pieces: two 4-foot boards for the short sides and two 8-foot boards for the long sides. Next, assemble the frame by attaching the boards at the corners. You can use screws or nails to secure the boards. A power drill makes this process much quicker, but a hammer will work too.
For additional strength, you can reinforce the corners with metal brackets or extra wood pieces, ensuring the bed will hold up over time.
Level the Bed and Position It
Once your frame is assembled, place it in the chosen location. Use a level to ensure the bed is even on all sides. If your ground isn’t perfectly level, you can dig into the soil on one side or add soil under one corner to balance it out.
Fill the Bed with Soil
The next step is to fill your raised bed with soil. A good mix consists of about one-third compost, one-third topsoil, and one-third organic matter (such as peat moss or coconut coir). If you’re building a deeper bed, you can fill the bottom with organic matter like leaves or grass clippings to reduce the amount of soil you’ll need to buy. Add the soil in layers, filling the bed up to about 1 inch below the top edge.
Plant Your Garden
With your raised bed now in place, it’s time to plant! Choose plants that are suitable for your climate and the amount of sunlight your bed will receive. If you’re growing vegetables, be sure to space your plants according to their specific needs. Raised beds warm up quicker in the spring, so you can often start planting earlier in the season.
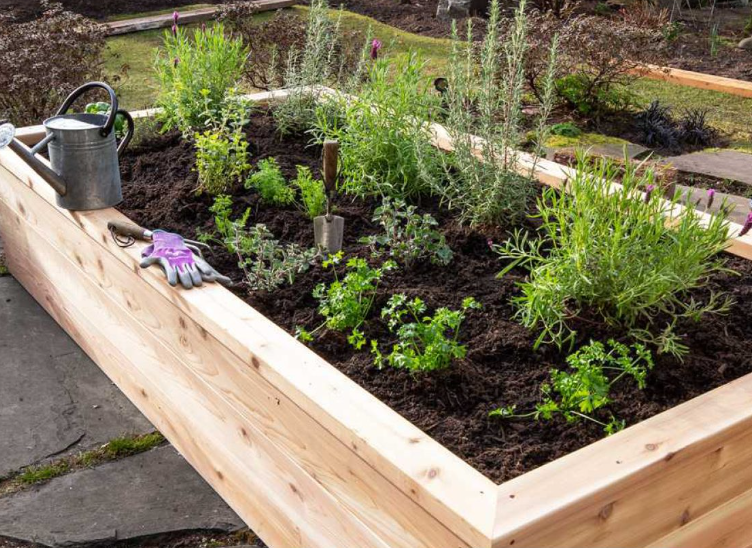
Benefits of Raised Garden Beds:
Improved soil quality: You have control over the soil mixture, allowing you to create the ideal growing environment.
Better drainage: Raised beds help prevent waterlogging and root rot, common issues in poorly-drained soils.
Less weeding: The structure of raised beds helps to minimize weed growth, as they are easier to maintain and access.
Accessibility: Raised beds are easier on the knees and back, making gardening more accessible for people with limited mobility.
